Assigning Thumbnails to your Events
- Introduction
- Best Practices and Restrictions
- Navigating the Video Frame Selector / Keyboard Shortcuts
- Selecting Thumbnails from Recorded or Published Media
- Uploading Custom Thumbnails
- Selecting Thumbnails from your Global Media Library
Introduction
As of Control Center release v2.36.00 every Event provides a Thumbnail Selector tool which allows you select a frame from a video recorded or uploaded video, upload an custom image, or select an image from your Global Media Library.
This selector can be found across all of your Events Assets tab.
Best Practices and Restrictions for Uploaded Images
When uploading or selecting a thumbnail our System will automatically rescale the image to 800px x 450px but will do so proportionally (i.e. attempt to maintain the image's original aspect ratio).
- Accepted File Types:
.png, .jpg, .jpeg, .webp - We target a 16:9 ratio so ensure your thumbnails are uniform with the Media Player for most users.
Note on 4:3 aspect ratios:
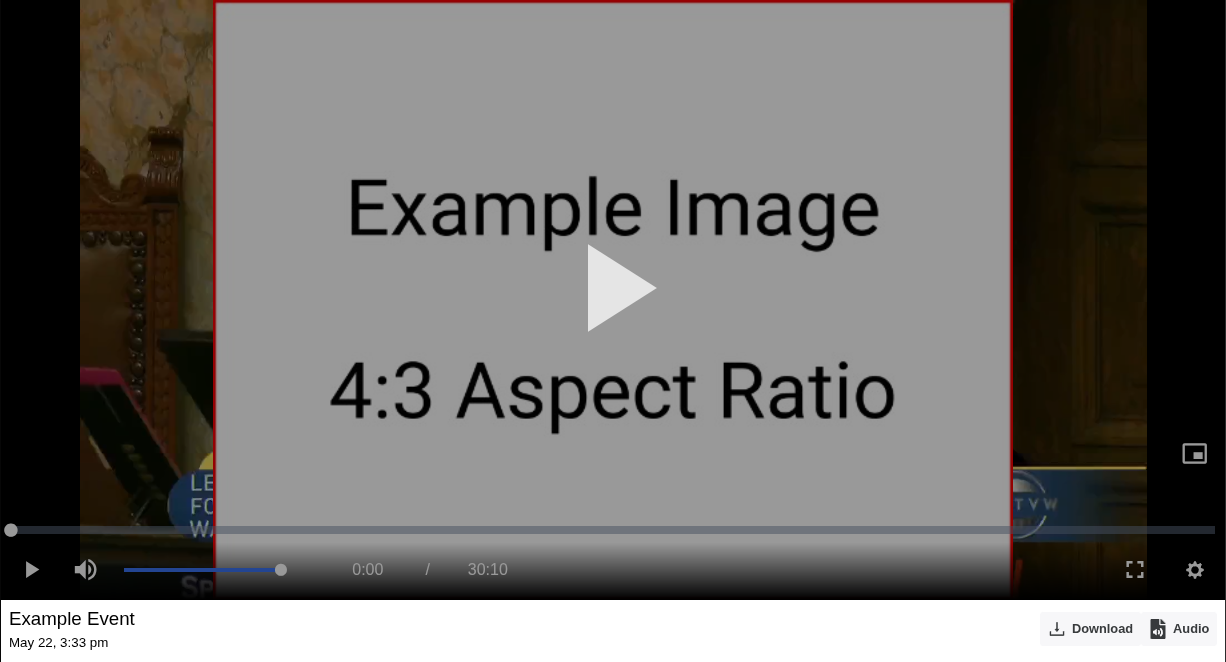
If your source stream or uploaded media has a 16:9 aspect ratio and you provide a thumbnail with a 4:3 aspect ratio (of whatever dimensions) you run the risk of having the default media still showing up behind your thumbnail (see below)
Navigating the Video Frame Selector / Keyboard Shortcuts
- The Arrow buttons below the player will seek in +/- 10 second intervals
- The arrow buttons on your keyboard will seek in +/- 1 second intervals
- Holding Shift while using the arrow buttons on your keyboard will seek along the video frame-by-frame
- Pressing the spacebar will pause and unpause the video
- Pressing the enter key on your keyboard will select the current frame in the video as the thumbnail
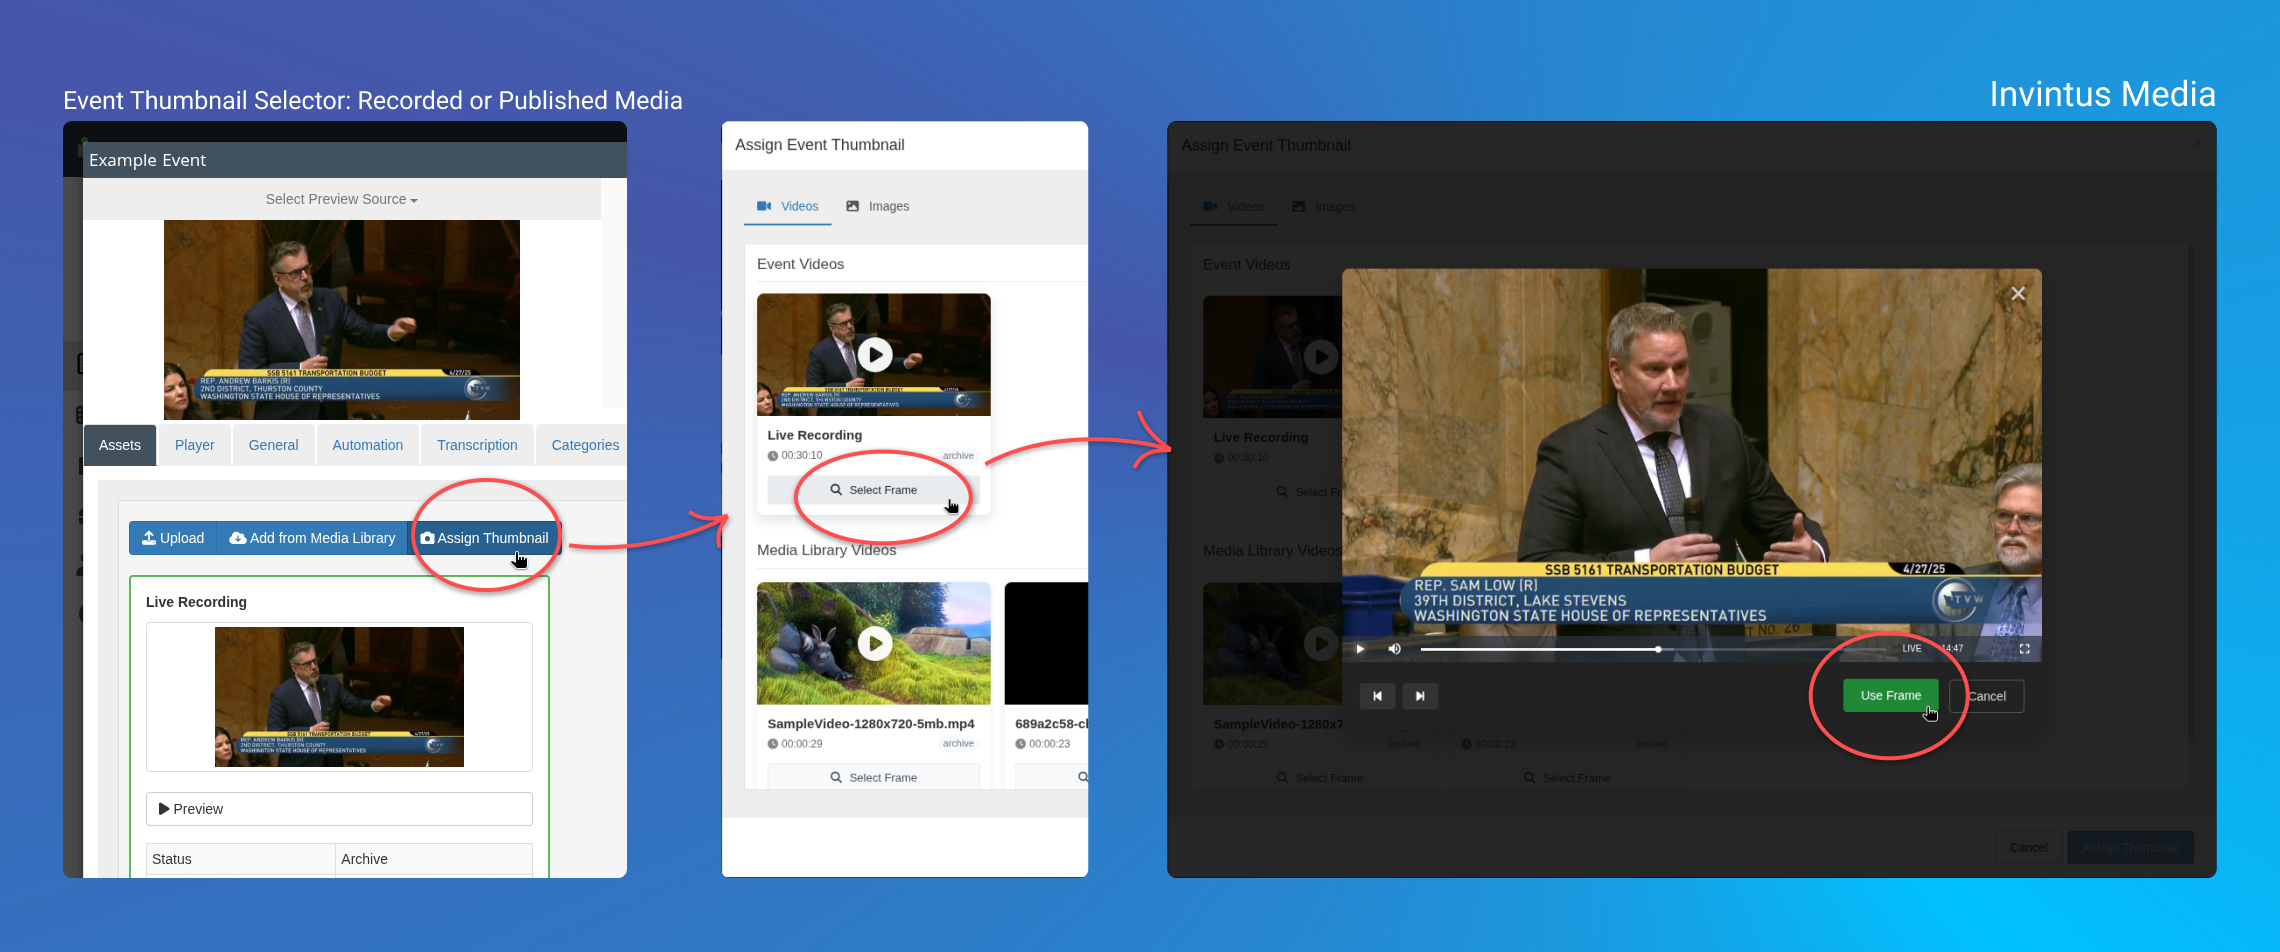
Selecting Thumbnails from Recorded or Published Media
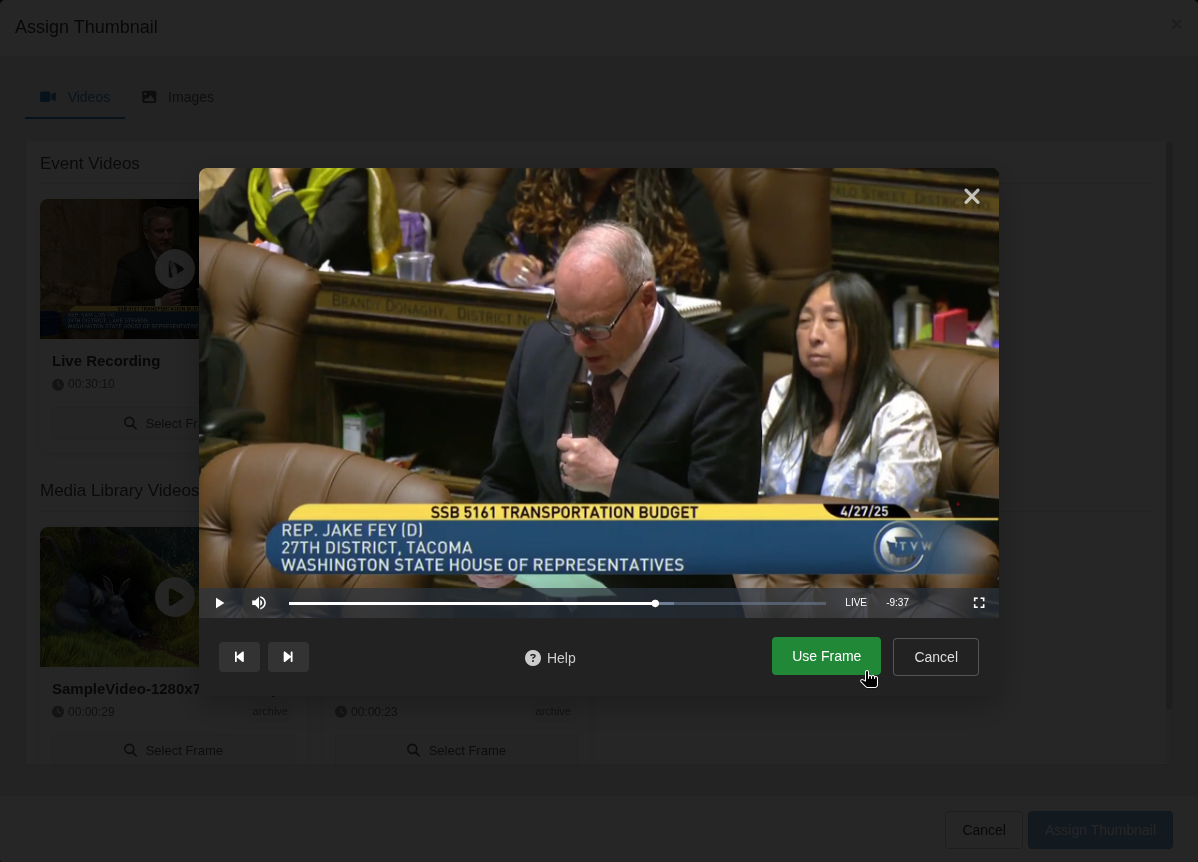
- Click "Assign Thumbnail" from the Event's Assets tab
- Click "Select Frame" on the desired Recorded or Uploaded Media
- Navigate to the frame in the video you'd like to use as a Thumbnail
- Click "Use Frame"
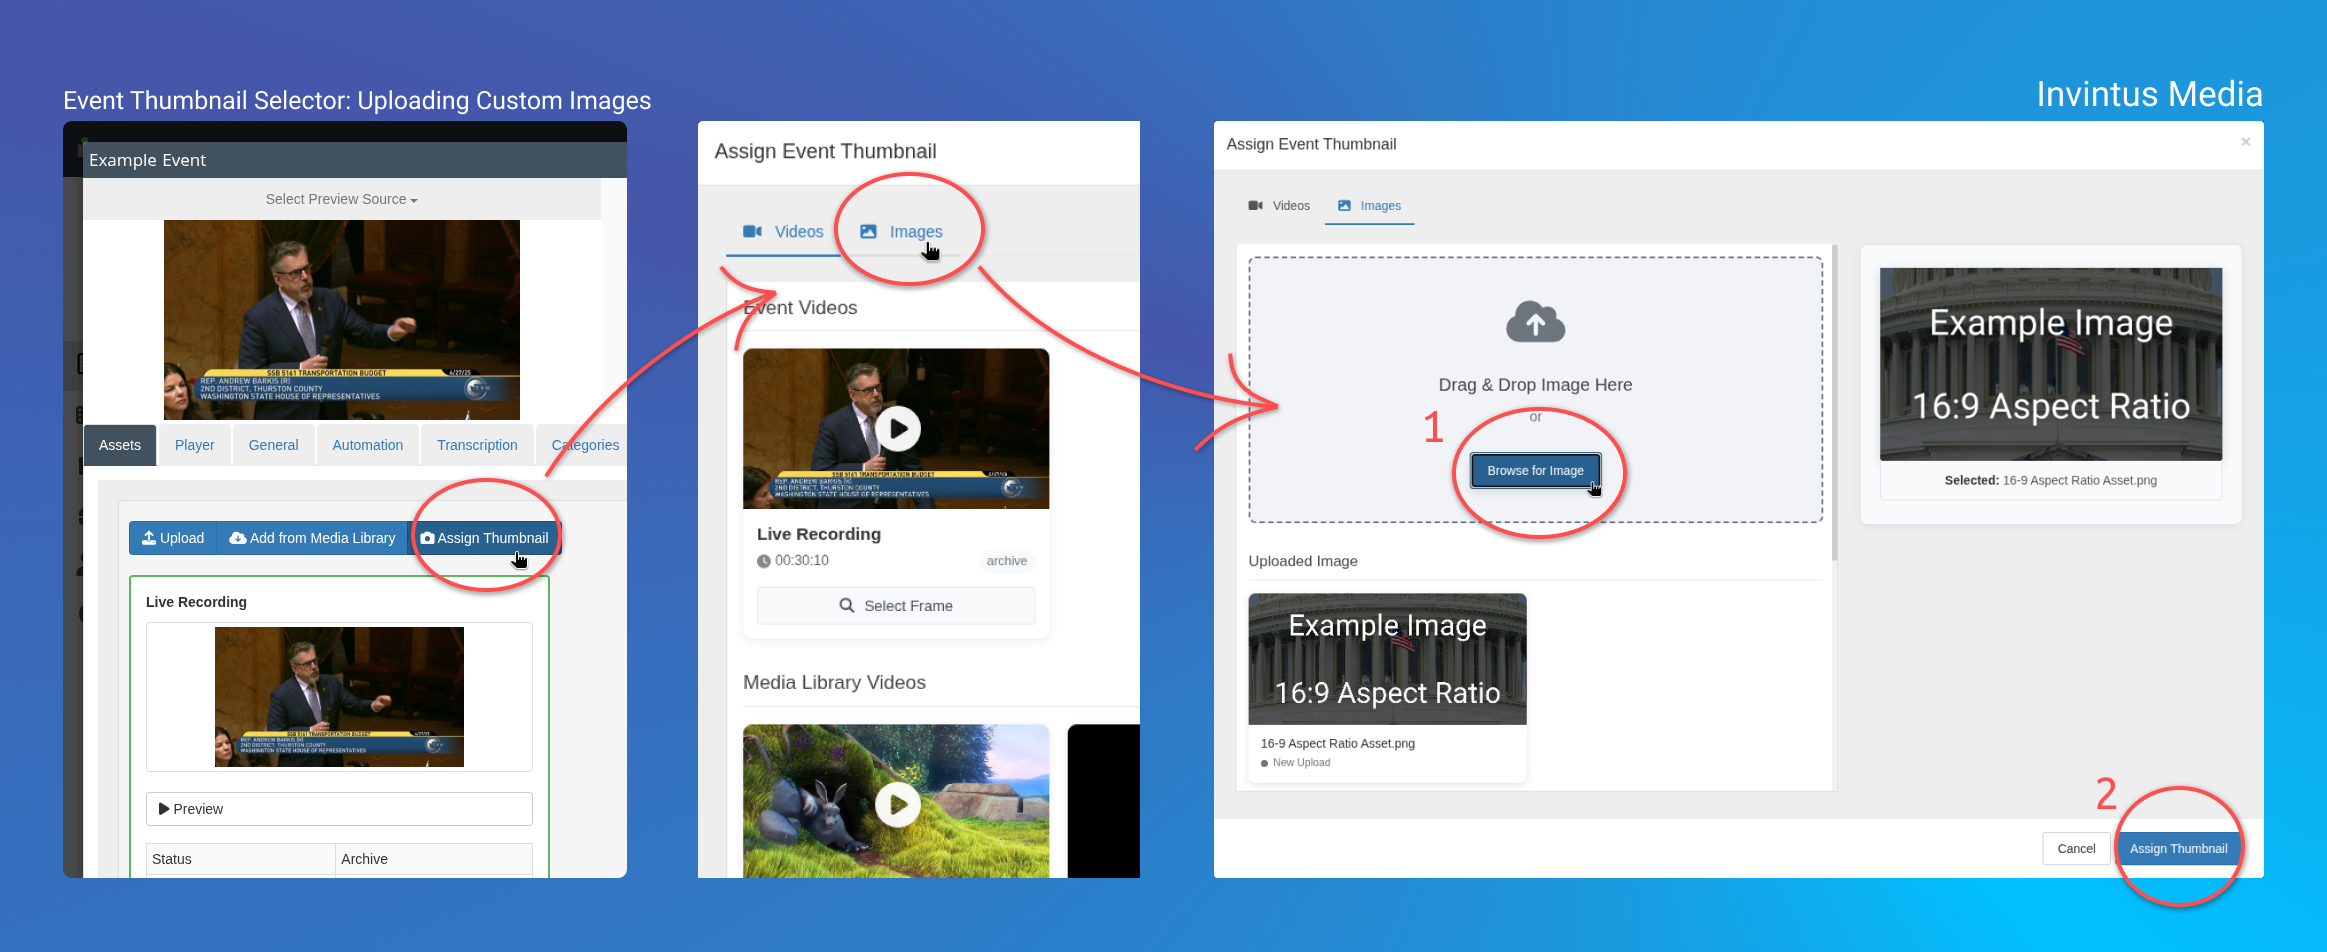
Uploading Custom Thumbnails
- Click "Assign Thumbnail" from the Event's Assets tab
- In the top of the modal/pop-up, click "Images"
- Click "Browse for Image" and select the Image you'd like to use
- Click "Assign Thumbnail" on the bottom right of the modal/pop-up
Selecting Thumbnails from your Global Media Library
Whether in the Videos Tab or the Images tab, When you open the Thumbnail Selector you are presented with two separate sections of media:
- Event Videos
- Media Library Videos
and, likewise for the Images tab:
- Event Images
- Media Library Images
The "Media Library Videos / Images" come from your account's Global Media Asset Library. In order for those to be listed, you need to upload them prior to selecting a thumbnail from them (and if you uploaded Video media, you need to wait for the Transcoding process to complete).
Assigning Thumbnails to Specific Assets
The new Thumbnail Selector also works for individual assets.
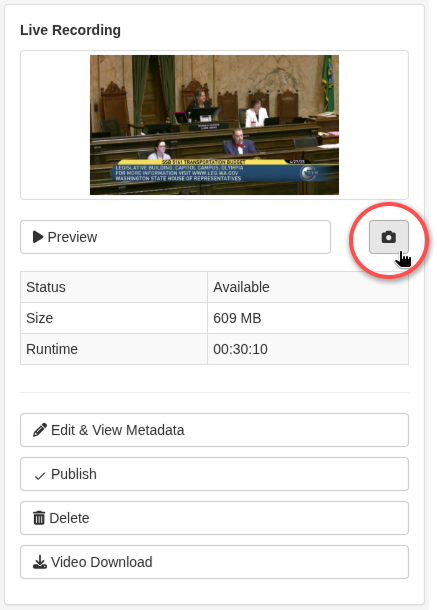
To bring up the by-asset thumbnail selector, click on the asset's Camera icon (must be a video). The Thumbnail you select will become the Event's main thumbnail if you publish the asset.